Your first material
This walkthrough starts with the material produced by Make Proc. The goal is a darker, readable ground surface whose appearance you can tune without replacing bitmap files.
Create the source
- Open the Tile Picker and select a vacant board cell or the tile you want to make procedural.
- Click Make Proc. The Procedural Materials sidebar opens while the map remains available.
- Inspect the material rows. The starter has a Base Color row and a Roughness row.
- Select an operation to see Props. Drag a numeric value or enter one directly.
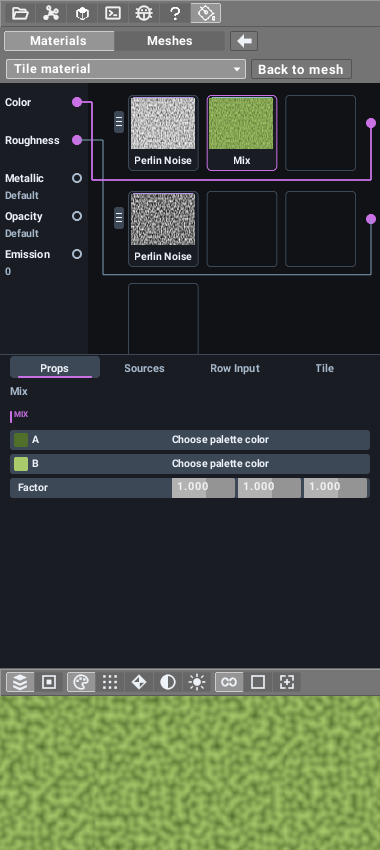
Rows describe the material; the preview displays their evaluated result. The AI header is omitted.
A row evaluates from left to right. Rows evaluate from top to bottom, so a row can consume an earlier row's result. Sources contains the operations you can drag into a slot. Use its search and category filter when looking for a particular pattern.
Follow the starter's color row
The starter uses Perlin Noise, then Mix. Noise supplies varying values; Mix uses them to blend between two colors.
- Select Mix in Base Color.
- Pick two relatively dark colors from the project palette. Start with a dark green and a slightly lighter, less saturated green.
- Watch the material preview while changing one color at a time.
- Select Perlin Noise and adjust its scale. Compare the result at the scale at which the player will see the ground.
Keep enough separation between the ground and props. Dark ground under a dark tree silhouette can hide the trunk and foliage even when both assets are individually attractive. Check the material on the map with a tree and character in view.
A restrained pattern generally works better as a large ground surface than a high-contrast pattern in every tile. Use a few clear shapes for grass and flowers through stamps, rather than filling the ground material with equally strong detail everywhere.
Separate color from surface response
The Roughness row drives a different output. Changing roughness should change the surface response without changing the base color pattern.
| Output | Meaning |
|---|---|
| Color | Surface color |
| Roughness | Low values are smoother; high values are rougher |
| Metallic | Whether the surface behaves as metal |
| Opacity | Transparency |
| Emission | Self-lit color |
For soil and grass, start with high roughness and metallic zero. An unconnected output uses its constant. Height and Normal are not exposed as material outputs in this editor.
The preview below the sidebar can show a channel or the selected operation. If it displays grayscale noise after selecting Perlin Noise, switch back to the material output to judge the final surface. A source preview is useful for checking a mask before combining it with color.
Give the pattern the right coordinates
The same material can be used on a diamond, a mesh face or a large terrain surface. Its coordinates decide whether you see one repeated pattern or a continuous landscape.
| Tiling choice | Use it when |
|---|---|
| Continuous | A pattern should continue across a terrain or wall surface |
| Repeat | An intentional repeating motif should wrap at a fixed period |
| Seamless | The wrapped edges need blending |
In 2D Iso, static ground materials can use coordinate-addressed source pages over the world X/Z plane. Extending the ground then reveals more of the pattern instead of stretching one UV diamond across the map. Keep the continuous preview enabled when checking a large surface; use a single repeat when checking the edges of a repeating texture.
A mesh texture has its own projection settings. Editing the material's pattern is different from changing how that pattern is projected onto a mesh. If bricks stretch around a wall, check its Material Texture projection, axes, origin and span as well as the material.
Try it on a hill
- Select the ground material and use the terrain-aware Paint workflow in 2D Iso.
- Paint a small patch across a hill.
- Raise, lower or smooth the hill using Terrain.
- Check that the patch follows the changed surface and remains in the same world location.
Use Auto road composition for a winding material path. This is a terrain material workflow; placing a row of rigid, flat mesh slabs does not make a continuous hill.
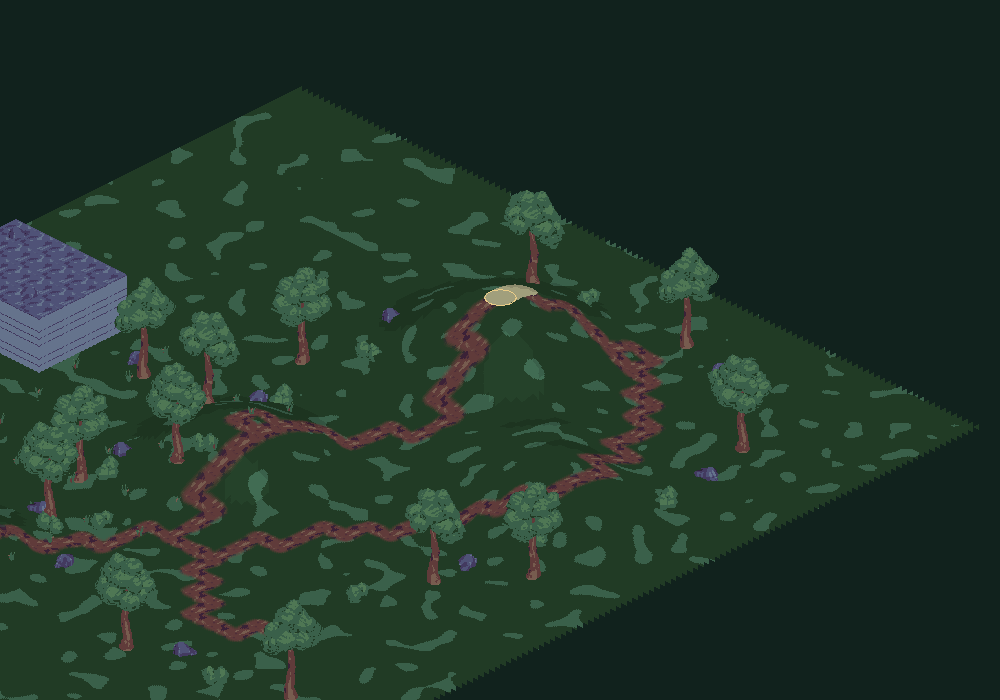
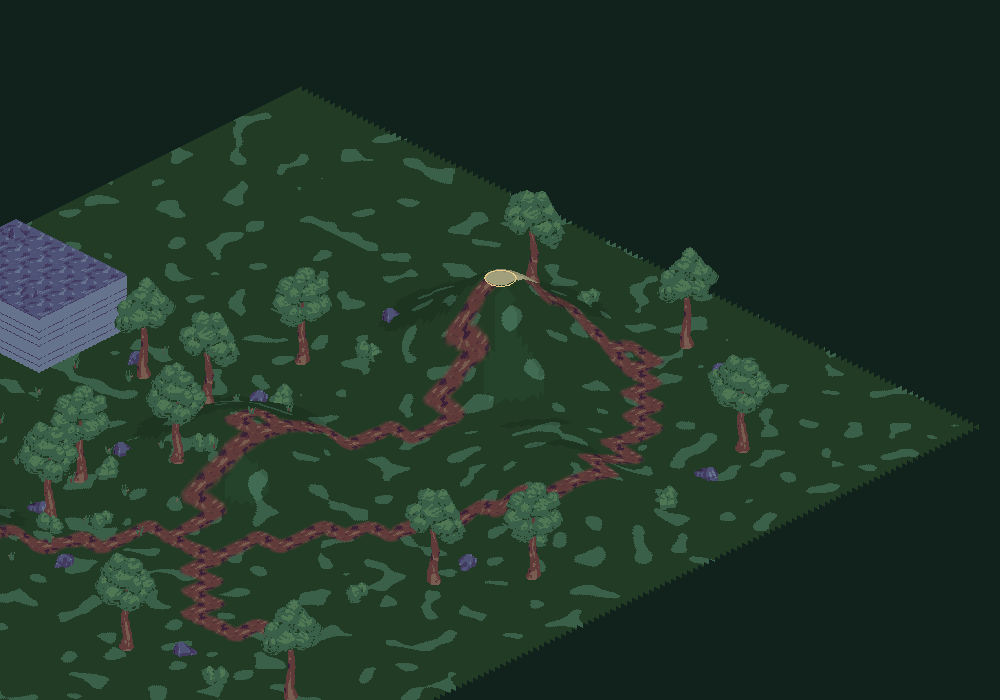
Paint stays attached to the terrain while its height changes.
Reuse and edit materials from meshes
When a Material Texture operation references a project material, use the material-opening control in the mesh editor to open its source. You can also select that material directly in the Tile Picker. Materials show a flat material swatch; their source is independent of the iso camera.
If the operation is PBR Material, edit its palette, roughness and metallic values in the mesh recipe. It is an inline surface, not a separate project tile. Palette bindings remain editable when the project's palette changes. Bitmap images can be used as inputs, but their colors are not automatically converted into palette bindings.
Check your result
You should be able to change the two main colors, noise scale and roughness independently; see the update in both the preview and the map; and reopen the saved project with the material still editable.
For a more involved source example, inspect crates/materialz/examples/continuous-bricks.material. Its rows build brick shape, edge shading, layout, weathering and color separately. Read the source alongside the editor's row/input model before trying to build all of those layers in one row.